
How to Successfully Use Adhesive Vinyl & DIY Laptop Decal
This is a sponsored post. I was provided product for this project. All opinions are my own.
I am a vinyl crafting fanatic. I view every blank surface as a possibility to add vinyl to give it a little more flair and love. From tiles, to shadow boxes, to cups, to Christmas ornaments~ you name it and I have probably vinyled it. If you have never worked with adhesive vinyl before, I encourage you to give it a try! I understand it can totally intimidating at first, but with your favorite YouTube videos, some tips like I am going to share with you today, and some patience, soon nothing will be safe from vinyl in your house! My most recent creation is a laptop decal for my daughter ~as per her request. Check it out, and some tips for using adhesive vinyl, and soon you will be on your way to happy cutting and crafting as well!
Tip #1: First, prepare your cut file in the software you are using. Depending on your cutting machine will depend on the software you are using. I use a Silhouette Cameo, so I am using Silhouette Studio for my files.
Your cut file is the design you are going to cut out of vinyl. Think of it like sending a file to the printer to print ~ same concept, just a small blade cuts your vinyl on your cutting machine. You can find scads of free cut files on Pinterest, and some that come at a small cost on Etsy, etc. Or, if you are creating something simple like my laptop decal, you can easily set that up yourself. Since it is just text, I was able to choose two different fonts that I liked and set it up in my software.

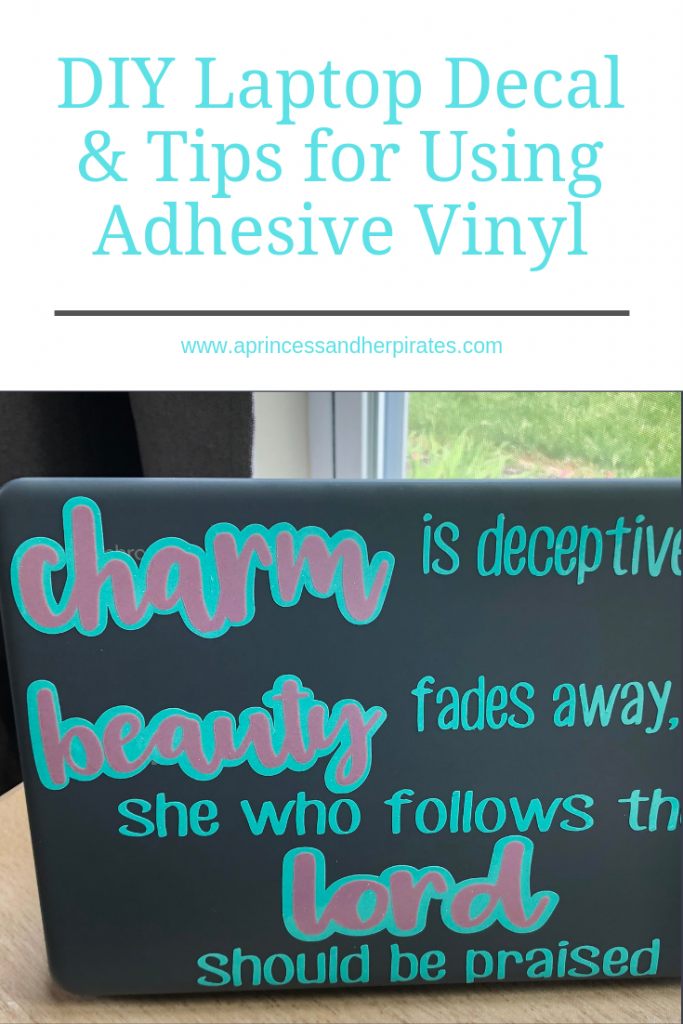
For this project, I typed “is deceptive, but”, “fades away, but”, and “she who fears the should be praised” in three separate text boxes. Then I typed “charm”, “beauty”, and Lord” each in their own text box. That is how I was able to use two different fonts.

Tip #2: Scale your design. That means, measure your surface where you will be applying the vinyl. This will help you determine how big or small to cut the design. Open up your cut file design in your cutting machine software, and then scale the design to the size you want. For this particular project, I had to line up my text with each other, Select all, and then Group so I could size it appropriately.
I am using Silhouette Studio software, but the process should be similar with any program you are using. Simply click on the design and then drag the corner handle to scale the design to the size you want.
Tip #3: Set your vinyl up to be cut. First, turn on your machine and make sure it is set to “Load Media” if you are using a Cameo. Next, lay your vinyl with the backing side down on the sticky side of the mat. Some people like to make the cut without a mat….I am not one of those. I always use a mat. The “backing side” is typically white, similar to what you would find on the back of a sticker. For my decal, I chose to use the StyleTech Craft Glitter Vinyl and the StyleTech Craft Transparent Vinyl.

Tip #4: Adjust the cut settings in your software or on your machine to work with the material you are using. This process will be a little bit different for every cutting machine, but just make sure to choose the settings for the particular type of vinyl you are using. I used the “Silhouette Vinyl” setting for this project, and set my blade at a 2. It cut perfectly. Do keep in mind that new blades tend to cut deeper and sharper than ones that have been used several times.
Putting a piece of scrap vinyl, or a color you don’t love, through your machine as a small test cut is a really good idea. This allows you to adjust the blade if you need to, and make sure it is cutting through the vinyl cleanly….but NOT cutting the backing. When it is time to weed your project, it will be so much easier if you have done a test cut. When you are happy with the test cut, load your vinyl onto the mat and load it into your machine. Then click “Cut”….or in my case “Send to Silhouette”.

Tip #5: Have the right tools on hand for weeding. Weeding is the part that always makes me nervous ~ it can make or break your project. If you pull off the wrong vinyl, or it didn’t cut through all the way, you have to cut it again, which can be frustrating. I like to use my StyleTech Craft tweezers and my “spatula” looking tool. I also have my “picker” close by as well. This looks like a very thin, sharp hook and is priceless when it comes to weeding.
When I am weeding, I start by gently pulling, at an angle, the vinyl around the outside of my design. Once I pull all of that off, I am left with my design, and can weed out the super small parts, like the circles in the “a”s, or the “o”s.
Right there with the tools is the transfer tape. This can really make or break your project, and it is so important to have a good transfer tape on hand. There are lots of good options, but I really love the clear transfer tape from StyleTech Craft. The grid lines make it super easy to use, the stickiness is just right, and it lasts forever.

Tip #6: Make sure you prepare your surface for applying your vinyl. I make sure I dust off the surface, and sometimes even clean it with alcohol before applying the vinyl. Roll out a little transfer tape, and cut it slightly bigger than your decal. Lay your decal face down, and peel off the backing. Carefully line it up on your surface, and smooth it over with your fingers. I also use a good burnishing tool, sort of like a pan scraper, to make sure I get all the air bubbles out.
Again, peeling at an angle is your friend. I peel it off at an angle, starting in one corner, while gently pressing down on the design with my other hand.
If you notice in my project, I used two colors of vinyl. This is made possible by the “Offset” function in my software. I highlighted the “charm” and chose “Offset”. Then I clicked the arrow until it created an outside layer of my word. From there, I ungrouped them, and cut them separately. The “Offset” shape looks like a shadow of the original shape, and serves as the bottom layer of your design. And then you add the original word to the top.

I think this project is a great idea for beginners, or those who want to step up their adhesive vinyl game just a bit by using the Offset and layering their vinyl. A laptop makes a great surface to vinyl because it is nice and flat, and an easy shape to work with.
What tips do you have for using adhesive vinyl?

I love the fonts you used for this. I should think about adding a vinyl “something” to my laptop. I think this looks amazing!
Thank you so much!