
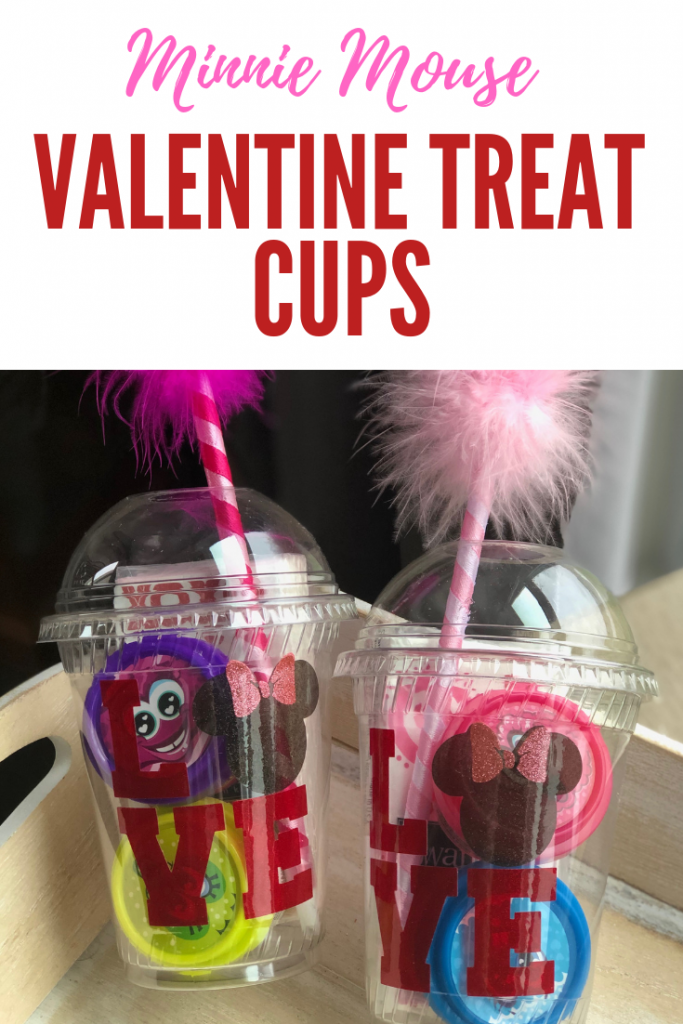
Minnie Mouse Valentine Treat Cups
Minnie Mouse Valentine Treat Cups are an easy way to share your love for others on Valentine’s Day! And since we all love a little Disney here on A Princess and Her Pirates, today I am sharing a Minnie Mouse themed project with you! I am sure you will want to share this with the ones you love this Valentine’s Day!
This is a sponsored post. As a member of the 2018-2019 StyleTech Craft Design Team, I have been provided product and compensation in exchange for my creative ideas. The views and opinions are my own.
Disclosure: This site uses affiliate links. If you choose to make a purchase using one of the links, I receive a small commission (at no additional cost to you) that helps offset the costs of maintaining this site.
Friends, I don’t know about you, but I love the sparkle. Give me some glitter and I am a happy girl! I am so excited to be sharing this with you today as part of the StyleTechCraft™ Design Team! Each month, I am going to share a new project with you, in hopes of bringing some creativity and design into your home!
This is a great project for a beginner. The file isn’t too big or too small, and there are not a lot of tiny pieces to weed.
Minnie Mouse Valentine Treat Cups Materials
- StyleTech Craft Transparent Glitter Vinyl
- Silhouette Cameo or alternative cutting machine
- Transfer Tape
- Plastic Cups with Dome Lids
- Valentine’s Day Goodies
- Minnie Mouse LOVE File {click on the link to find out how to get this file for your future projects!}

Filling Your Valentine’s Day Treat Cups
Filling your cups with treats is easy! Here are some great ideas:
- Travel Size Tissues
- Sticker Sheets
- Small Jars of Playdough
- Slime
- Fun Keychains
- Post it Notes
- Bubbles
- Pencils
- Crayons
- M&MS Valentine’s Day Cookies
Tips for Cutting Transparent Vinyl
First, you need to load your vinyl on the cutting mat with the colored side facing up. If you load it facing down, it will cut your shape backwards.
Also, when using two types of vinyl, like in this project, double check your cut settings. You can access the cut settings on the “Send” tab in Silhouette Studio. Select the default material that is closest to what you are using.
Sending a test cut on a scrap piece of the same type of vinyl is a good idea. This will give you an indication as to whether or not you need to double cut, or possibly adjust the blade before cutting your file.
Cutting with a mat has a lot of advantages. It is easier to load your vinyl into your machine. Secondly, the vinyl has a lesser chance of slipping around during the cutting process. Some people do choose to cut without one, but I am not that adventurous :).

I will say, using the transparent vinyl is amazing. This Transparent Vinyl cuts AND weeds like a dream! I absolutely loved it! Plus, it is the only glittered vinyl that is glittered on BOTH the inside and the outside! It is great for layering, and the results are SO cute!

When layering the vinyl, I found it very helpful to put the Minnie Bow on the Minnie Head BEFORE adding it to the cup. It is such a small cut, and I thought it was easier to line it up on the Minnie head when I had my flat counter top to work on, as opposed to the roundness of the cup surface.
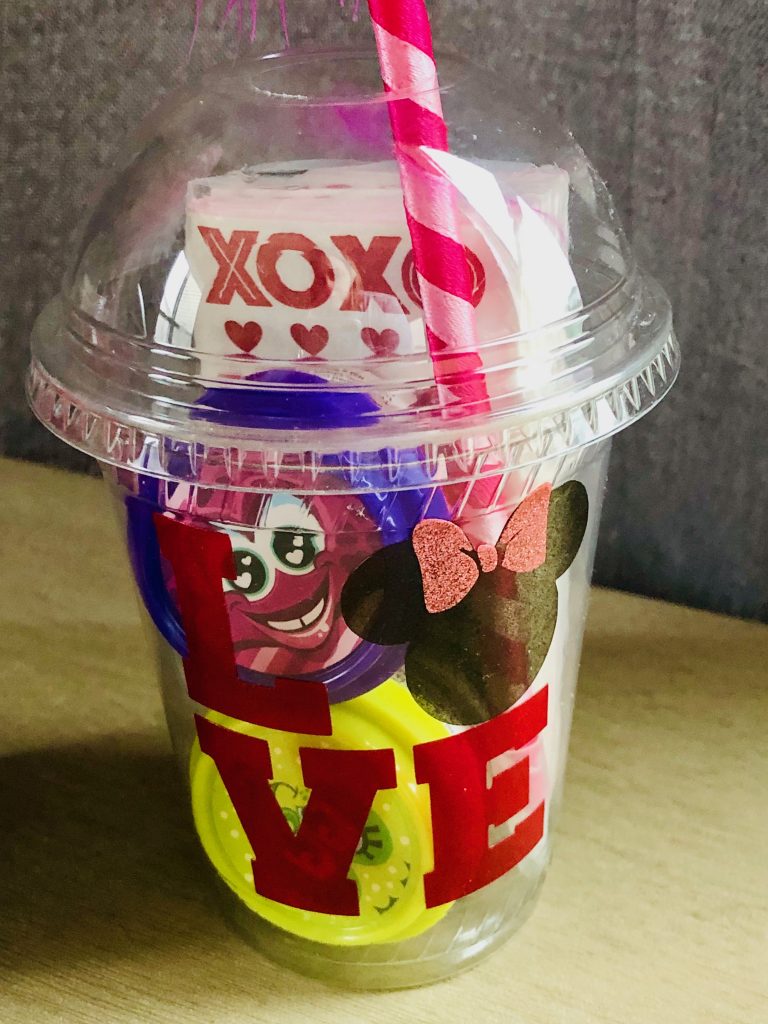
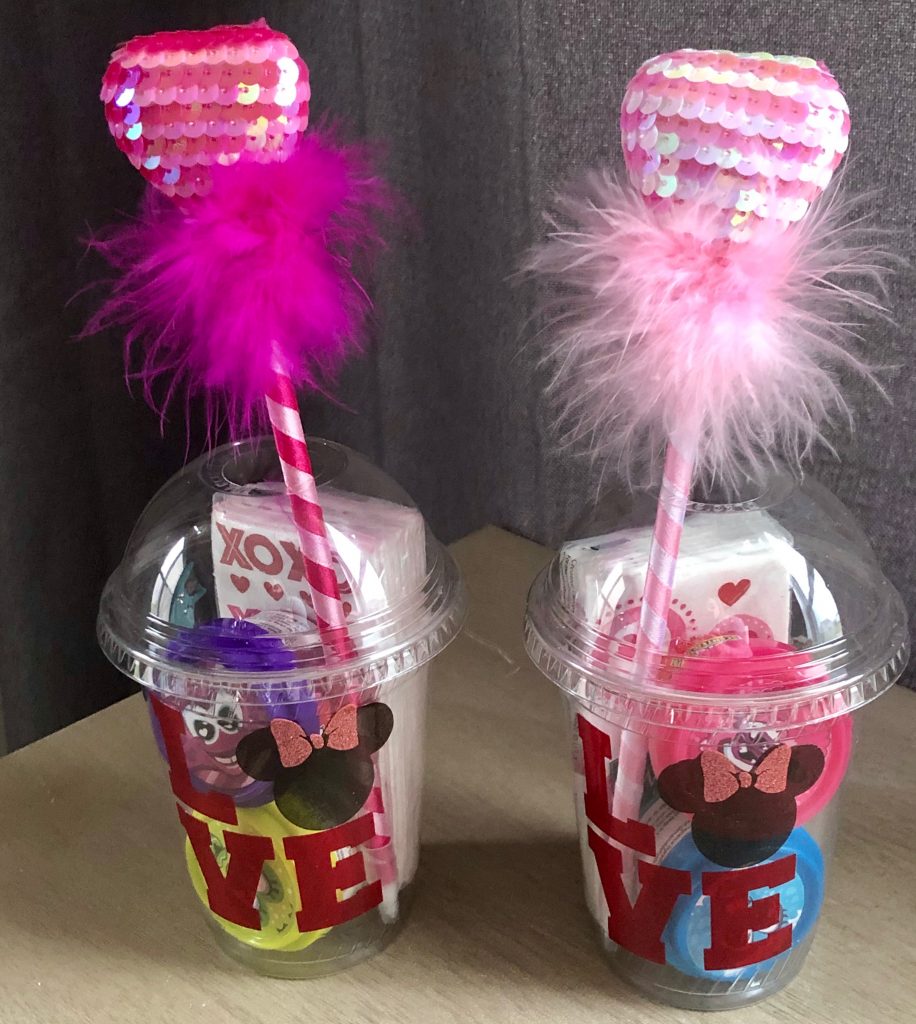
Finally, you want to fill it with your favorite Valentine’s Day goodies. My daughter’s class only allows food free treats for parties. So, this was so fun to fill with slime, tissues, and a Valentine’s Day pen! Stickers, stamps, bubbles, chap sticks….you can put so many cute things in these! I can’t wait to finish these for my daughter’s class! Only 21 more to go! Isn’t it so sparkly and fun?!

Minnie Mouse Valentine Treat Cups
Create some adorable Minnie Mouse themed treat cups for your Valentine!
Materials
- StyleTech Craft Transparent Glitter Vinyl
- Silhouette Cameo or alternative cutting machine
- Transfer Tape
- Plastic Cups with Dome Lids
- Valentine's Day Goodies
- Minnie Mouse LOVE File {click on the link to find out how to get this file for your future projects!}
Instructions
First, download the Minnie Mouse LOVE File into your Design Software.
Next, size it to fit your cups. Mine is a 3x3 square.
You will need to use the "Ungroup" function on your Silhouette Design screen. This is one of my favorite functions of the Silhouette Design software, and I use it all the time! Click on the file to select it. Next, right click and choose "Ungroup". From here, remove the Minnie Head and the bow, and set them to the side of your screen.
Next, load your Transparent Vinyl into your cutting machine. I set my cut on a "2", and it breezed right through. You want to insert your vinyl with the color side up.
After you have cut your "LVE", then you want to remove those from your design screen, to the side. From here, add the Minnie head and send that to cut. Repeat this process for the Minnie bow as well.
Next, it is time to weed. Oh stars! Does this Transparent Vinyl cut AND weed like a dream! I absolutely loved it! Plus, it is the only glittered vinyl that is glittered on BOTH the inside and the outside! After you weed your vinyl, you want to add the transfer tape so you can place it on the cups.
Then, add your "LVE" to your cup. Gently peel the transfer tape off, and set it aside. Next, repeat the process with the Minnie head.
Finally, you want to fill it with your favorite Valentine's Day goodies.
Recommended Products
As an Amazon Associate and member of other affiliate programs, I earn from qualifying purchases.

More Great Valentine’s Day Ideas:
80+ Valentine’s Day Printables

Carrie Hurst
Not only do I love sharing all my vacation tips and ideas here on A Princess and Her Pirates, but I also work alongside families to create magical vacation memories year after year! Email me at carrie@destinationsinflorida.com to begin the planning process, and join hundreds of families on my current guest list.
These are so cute. I have a little Grand daughter on the way and I cannot wait to make things just like this when she gets older. Super cute!
Thank you! I am sure you will be making so many cute things for her!
I love how these turned out!
Thank you! I LOVE the transparent vinyl! It is beautiful! And so easy to work with.
So cute with Minnie in there! I love it!
Thanks, Morena! This project was so fun!