DIY Christmas Gifts~Coasters
DIY Christmas gifts are starting to be my “go to” for the upcoming season. Instead of thinking, “Where can I buy one of those?”, my thoughts turn to “I wonder what I could make for so and so’s gift?” With our boys rotating amongst teachers during their school day {no more self-contained classrooms}, that is 4 teachers I want to treat to a fun Christmas gift, not just one teacher anymore!

Thankfully, I can still get away with “From the Hurst Boys” and do one gift per teacher. Plus, as a former teacher, I always remember the kids who gave me thoughtful gifts, and often they were homemade. This year, I decided to tackle the DIY Coasters, with an intricate design and their last name.
Supplies:
4×4 tiles {I got mine from the bath section at Home Depot}
Oracal 651 Vinyl
Transfer paper
Felt circles
Download a Split Damask Design for your Silhouette Software. Admittedly, this is slightly different than the one I used. I got mine from a Facebook group I am in, but the one from the Silhouette Store will work just as well.
Size the design to slightly less than 4×4. Add the text and size it to fit evenly in the middle. I used a very simple, wide font for my words. With the intricate designs of the file, I didn’t want to mess with an intricate and delicate font, too.
Duplicate the design 4 times on your screen.
Place the vinyl on the mat and load it into your machine. Set it at Speed 8, Thickness 9, Blade 2.

Pull the excess vinyl off and then weed out the smaller pieces. I have to say, weeding on this was minimal, which is a huge plus! There were just a few small parts to weed, and everything came off easily.
***Quick Tip: After your cut, you’ll have 4 designs on the vinyl. Cut them into smaller, individual squares, before you start weeding.
Cut a piece of transfer paper that is slightly larger than your vinyl square. Lay your transfer paper down sticky side up. Then, lay the cut design face down on the transfer paper. So you should see the white backing of the vinyl sheet.

Gently, and starting at the corner, peel the white backing off at an angle. I find that peeling at an angle, and closely to the vinyl, keeps everything lined appropriately and and you’re less likely to take the vinyl up.
Center the design on the tile. Press it down easily, and then again at an angle, gently peel the transfer paper off.
Add the felt pads to the four corners underneath and you are all set!
Do you need to seal the vinyl at all? I’ve hear mixed things, so I went ahead and sealed it with a clear coat of Rustoleum Clear Coat Polyurethane. You could also use a Shellac. I feel like with coasters, this is a good idea. I’d hate for the vinyl to get too wet and start to peel. However, I have heard of others who have not coated it at all and it was fine. Hmmmm…..thoughts on that?

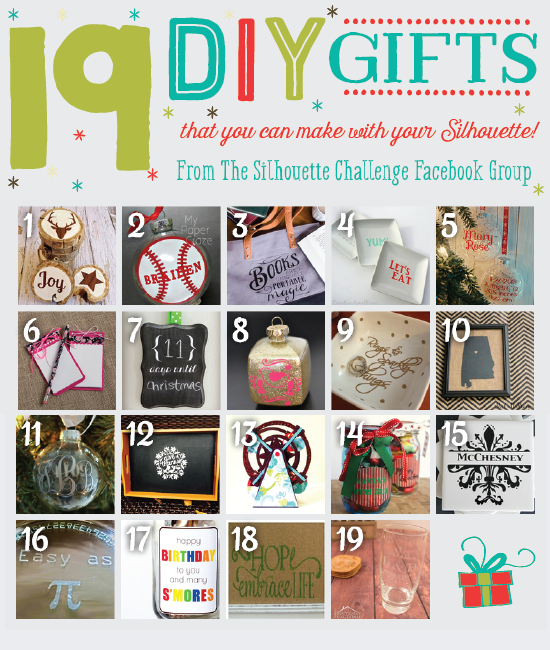
So for this month’s Silhouette Challenge, we have an amazing assortment of DIY Gifts to get your creative juices flowing! Enjoy!
Want to Check Out More Silhouette Projects?
My Silhouette Challenge buddies and I are all sharing projects on our blogs today, so peruse the projects below for a wealth of Silhouette inspiration!

1. Get Silvered // 2. My Paper Craze // 3. unOriginal Mom // 4. Creative Ramblings // 5. Chicken Scratch NY // 6. Pitter and Glink // 7. Ginger Snap Crafts // 8. Architecture of a Mom // 9. Silhouette School // 10. McCall Manor // 11. Just a Girl and Her Blog // 12. Weekend Craft // 13. Rutchee Design // 14. Adventures in All Things Food // 15. My Favorite Finds // 16. Please Excuse My Craftermath // 17. Simply Kelly Designs // 18. Dragonfly & Lily Pads // 19. Practically Functional //


Love the coaster idea–I’m probably making a few myself this season!
Very cute DIY! I think I will use these as a hostess gift. Thanks for sharing!
These turned out brilliantly Carrie. Great idea to monogram coasters 🙂
Hi, Pam. Thank you so much! I’m all about personalized gifts!
These are lovely! I’ve got coasters on my to-make list this Christmas too 🙂 I know those teachers will appreciate getting such a thoughtful and pretty gift!
I LOVE these! I’ve never even tried making coasters before, but these really make me want to give it a whirl. 🙂
Thanks! I hope you give it a try! Good luck :).
This is such a great idea! I’m sure the teacher will love them.
Carrie,
I LOvE your gift coasters. I have been curious about doing this type of project and Now I have directions. Awesome Job!
Thanks for the inspiration,
Karen Marie